Reports & Report Scheduler
The Reports section in Chat360 stores a complete history of all generated and downloaded analytics reports. Whenever a user requests a report—such as Bot Data, Multi-Bot Data, Agent Tickets, or Template Statistics the sy
The Reports section in Chat360 stores a complete history of all generated and downloaded analytics reports. Whenever a user requests a report—such as Bot Data, Multi-Bot Data, Agent Tickets, or Template Statistics the system processes the data in the background and records the request in Report History.
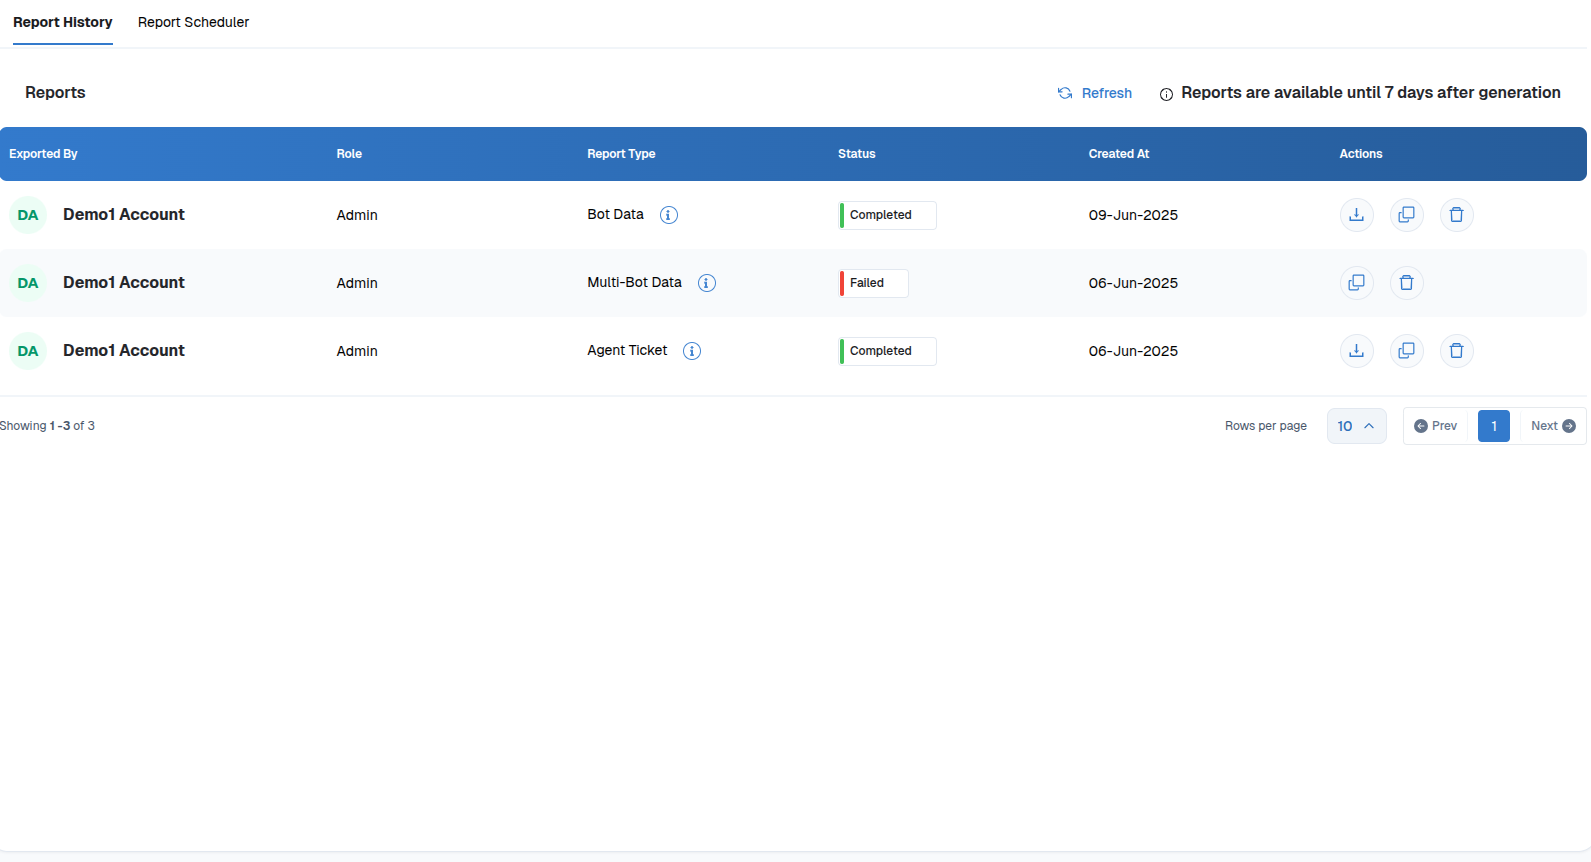
Each report entry displays its status, such as Completed, Failed, or In Progress. Once generated, reports remain available for download for 7 days.
Accessing Generated Reports
To view previously generated reports:
Navigate to Analytics → Reports → Report History.
Review the Report List, which includes the following details:
Exported By: Shows the user or account that requested the report.
Role: Displays the role of the user who generated the report (for example, Admin or Manager).
Report Type: Indicates the type of report generated, such as Bot Data, Multi-Bot Data, Agent Ticket, or Template Statistics.
Status: Displays Completed, Failed, or Progress.
Created At: Displays the date and time when the report was generated.
Actions
Users can perform the following actions on generated reports:
Download (⇩): Download the generated report file in CSV or Excel format.
Delete (🗑): Remove the report record from the Report History list.
Report Scheduler
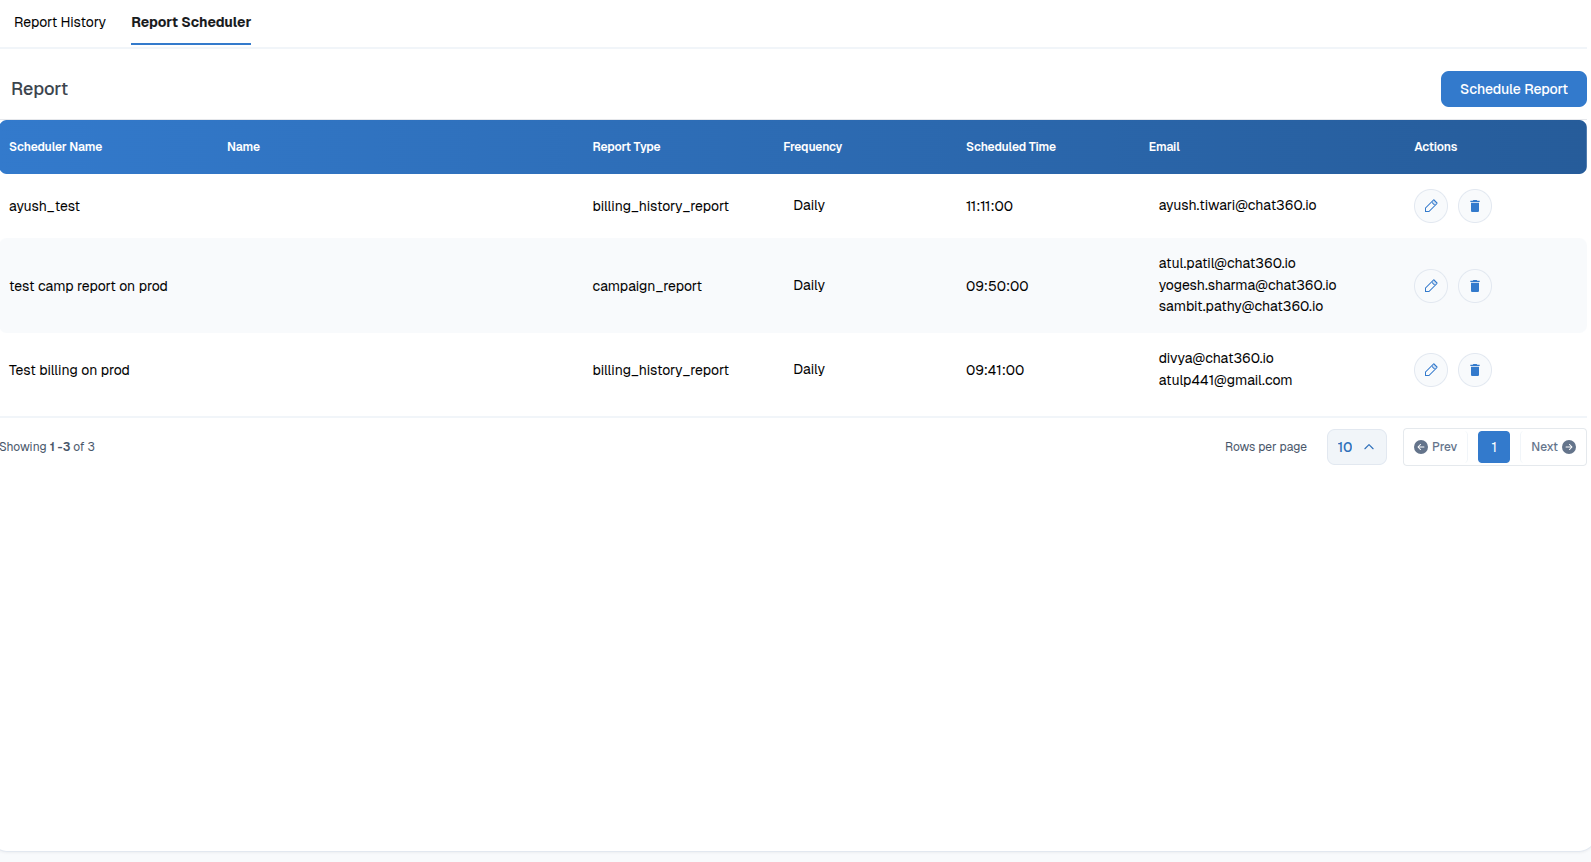
The Report Scheduler allows administrators to automatically generate and send reports to selected recipients at predefined intervals. This ensures stakeholders receive updated analytics without manually generating reports.
Reports can be scheduled to run daily, weekly, or monthly.
Creating a Scheduled Report
To schedule a report:
Navigate to Analytics → Reports → Report Scheduler.
Click Schedule Report to open the setup window.
Configure the following fields:
Report Type: Select the report type from the available options (for example, Bot Report).
Scheduler Name: Provide a descriptive name for the schedule, such as Daily Campaign Performance.
Frequency: Pick Daily, Weekly, or Monthly.
Delivery Time: Specify the exact time for report delivery using the 24-hour format.
Email Recipients: Enter up to three email addresses to receive the report. Press Enter after adding each address.
Click Submit to save the scheduled report.
Managing Scheduled Reports
Administrators can manage scheduled reports using the following actions:
Edit (✎): Modify the report frequency, delivery time, or recipient email addresses.
Delete (🗑): Remove the schedule to stop future report deliveries.
Functional Details
Processing Time: Large datasets may take several minutes to compile. Scheduled reports are processed in the background and delivered once the generation process is complete.
Report Retention: Generated reports remain available in Report History for 7 days. Scheduled report configurations remain active until they are manually deleted.
Failure Notifications: If a scheduled report fails to generate, an email notification is sent to the user who created the schedule.