Role-Based Access Control (RBAC)
Learn how Chat360 RBAC manages user roles, granular permissions, access levels and admin delegation for secure, scalable platform control.
Overview
Role-Based Access Control (RBAC) in Chat360 enables administrators to manage platform access through roles and granular permissions.
The system is designed to be flexible, allowing admins to define multi-level access structures, where users can be assigned precise capabilities across features.
With RBAC, you can:
Create custom roles with granular permissions
Assign multiple roles to a single user
Control access using Read, Manage, Delete
Configure multi-level admin hierarchies
Maintain system-defined roles for consistency
Role Hierarchy
RBAC follows a structured hierarchy of roles:
Role | Level | Description |
|---|---|---|
Admin | Highest | Full platform access and control |
Member | Configurable | Multi-level admin role with customizable permissions |
Team Manager | Mid-level | Operational control similar to existing system |
Agent | Lowest | Chat-focused access |
Member Role (Multi-Level Admin)
The Member role is a flexible role that acts as a configurable admin layer below Admin.
Key Characteristics:
Can be assigned any combination of permissions across all features
Acts as a multi-level admin, depending on permissions granted
Can have access equal to Admin (except core admin restrictions), or limited access
Fully controlled by Admin
How It Works:
If Admin has access to 50 features:
Members can also be given access to all 50 features
Admin decides the level:
Read
Manage
Delete
Permissions are fully configurable and scalable
Positioning:
Always below Admin
Can act as:
Sub-admin
Department admin
Restricted admin
Observer with elevated visibility
Default Roles
Role | Description |
|---|---|
Admin | Full access to all features |
Member | Configurable access (multi-level admin based on permissions) |
Agent | Chat and conversation handling access |
Team Manager | Same access as the existing system |
Notes:
Agent and Team Manager roles are auto-created for existing clients
These roles are immutable
Member role is configurable and editable
Permission Types
Each feature supports three levels of access:
Read → View access only
Manage → Create and update
Delete → Remove access
Access Hierarchy
Permissions are structured into three levels:
Main Feature Category
Sub-Category
Feature Type
Cascading Logic:
Selecting a permission at a higher level automatically applies to all nested levels
Ensures consistency and reduces manual configuration
Create a New Role
Step 1 — Navigate to Role Management
Go to Settings → Manage Roles
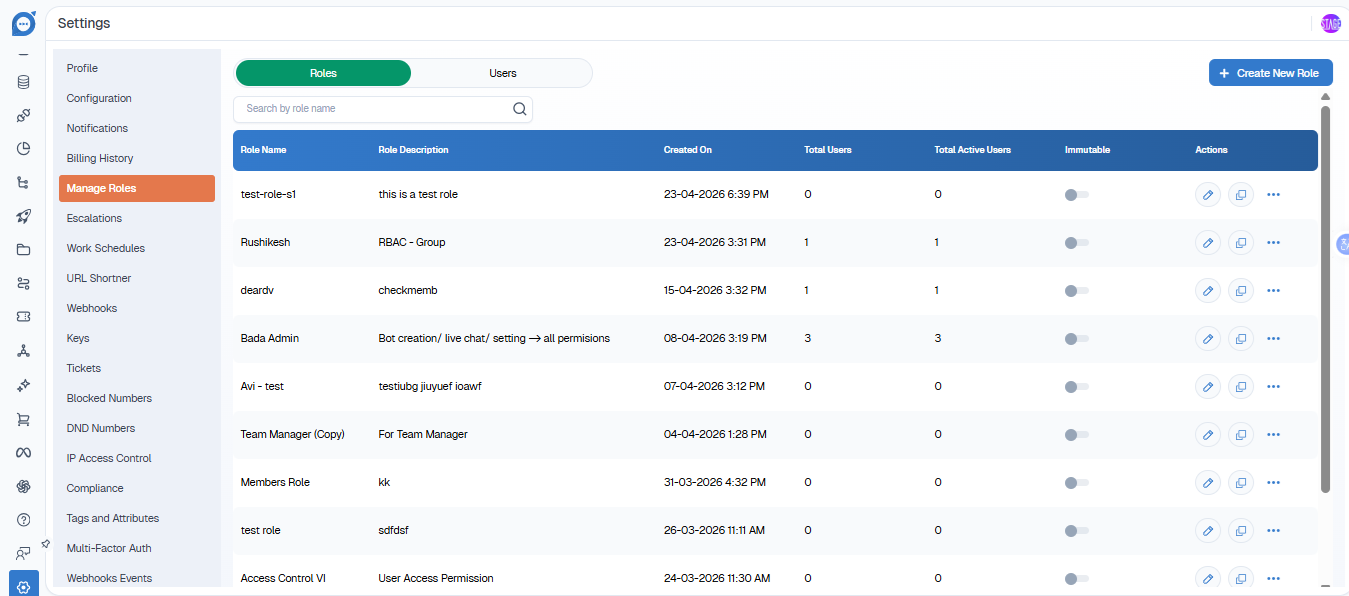
Step 2 — Click "Create Role"
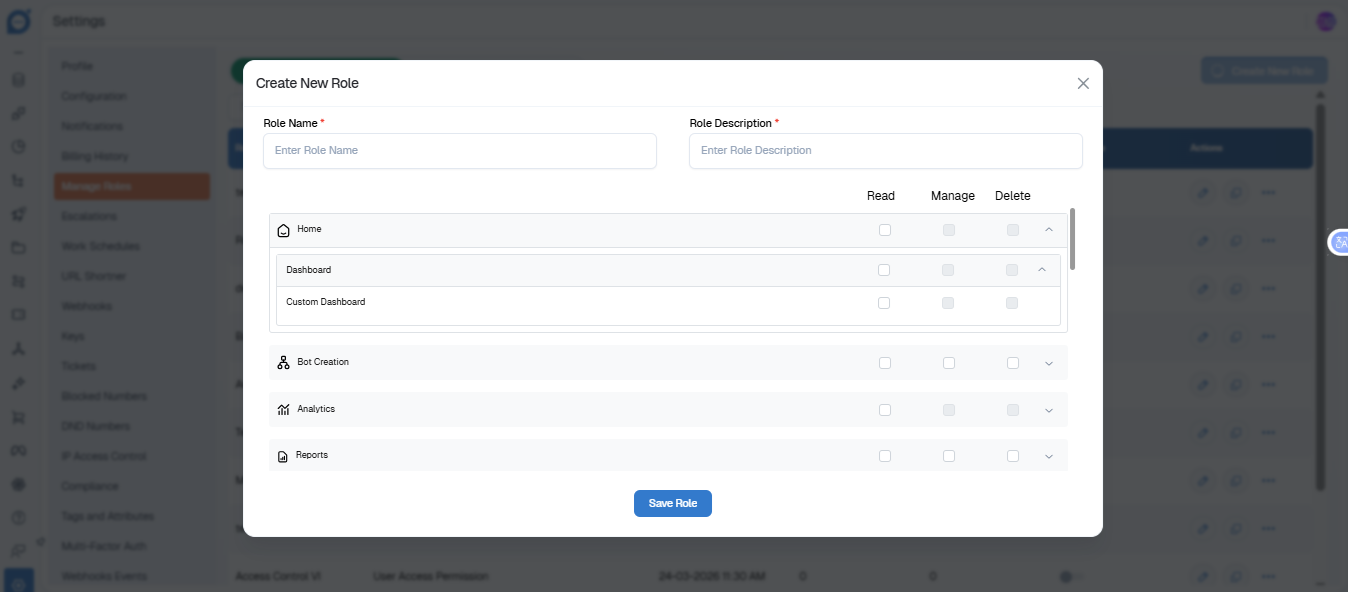
Step 3 — Enter Role Details
Role Name
Description
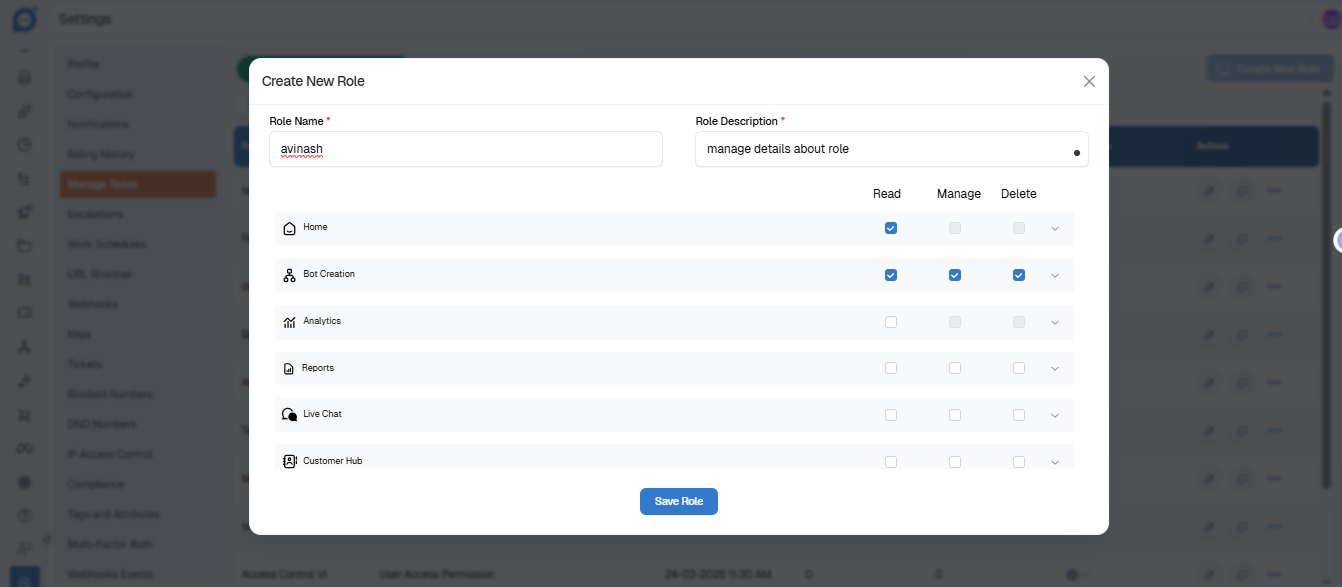
Step 4 — Configure Permissions
Expand categories and assign:
Read
Manage
Delete
Behavior:
Category-level selection cascades to all features under it
Permission availability indicators:
NA → Not applicable
Exists → Available
To Do → Upcoming
Step 5 — Save Role
Assign Roles to Users
Step 1 — Go to User Management
Settings → Team / Users
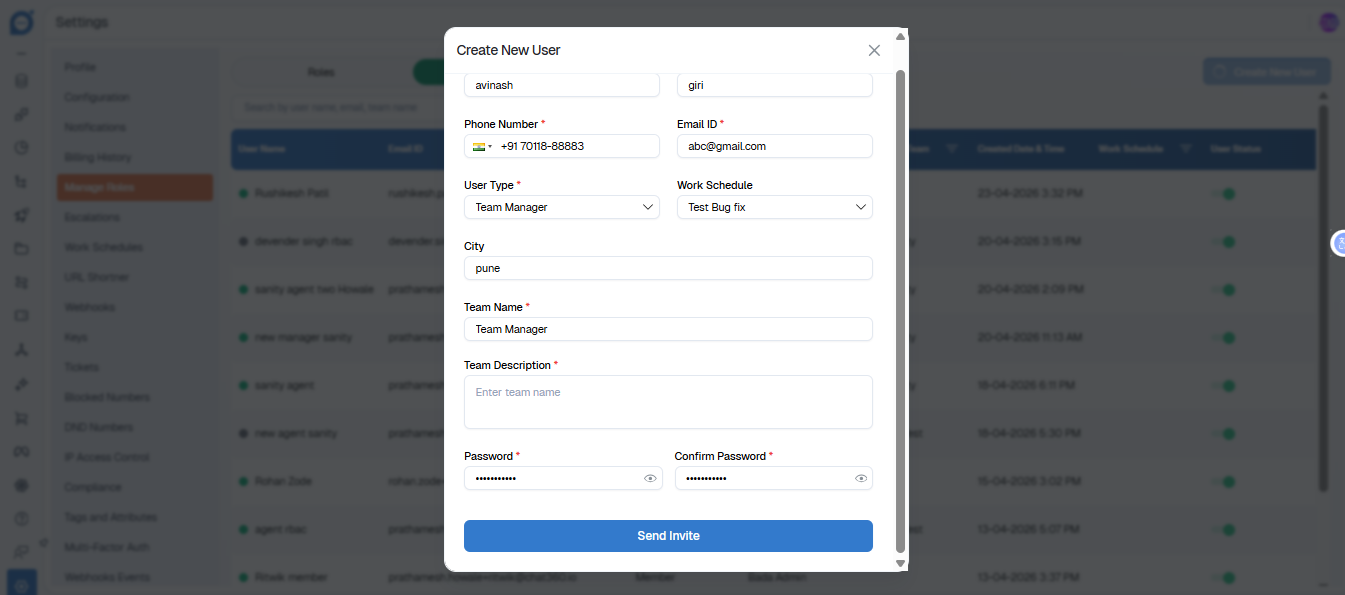
Step 2 — Select User
Step 3 — Assign Roles
Assign one or multiple roles to the user
Multi-Role Behavior:
Users can have multiple roles
Final permissions = union of all assigned roles
Example:
Member → Manage access
Agent → Chat access
Final → Combined access from both roles
Admin Control & Delegation
Admins can:
Create multiple Member roles as sub-admin layers
Assign feature-level permissions
Delegate control without giving full admin access
Example Use Cases:
Operations Admin → Full Manage access except Delete
Marketing Admin → Access only to campaigns
Support Lead → Manage chats and agents