General Settings
Configure Chat360 with admin controls for users, agents, campaigns, notifications, security, billing, workflows, integrations and platform settings.
The Settings section in Chat360 allows you to manage your account configuration, user access, integrations, and operational preferences from a centralized dashboard. From the left side menu you can access the settings section.
1. Profile:
The Profile section allows you to manage and update your basic account and organization details. In this section, you can view and edit:
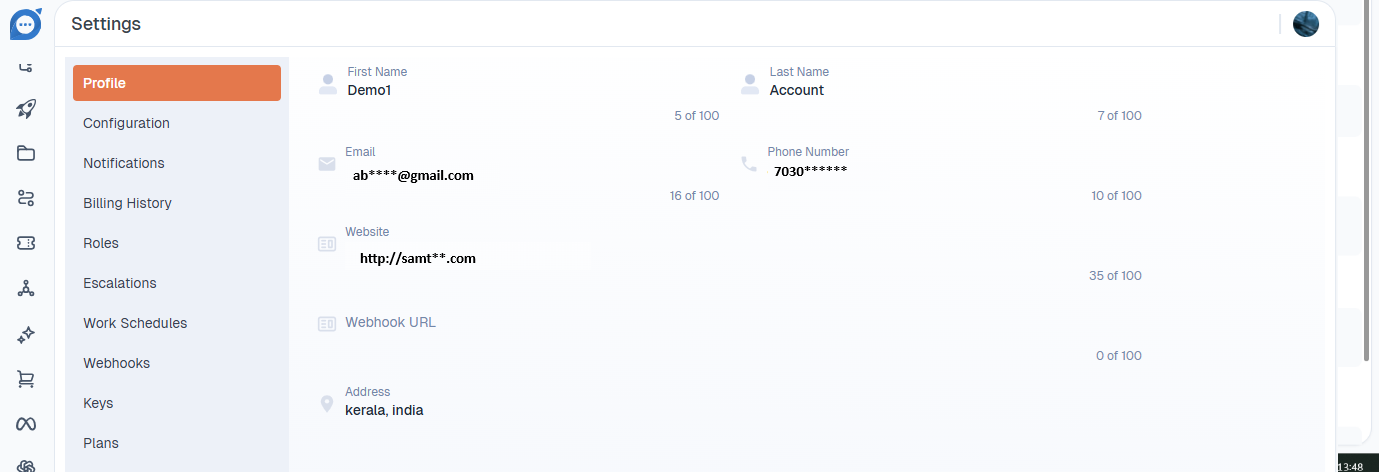
First Name and Last Name
Email Address
Phone Number
Website URL
Webhook URL
Address Details (Address, City, Zipcode, Country)
Timezone
You can click on Edit Profile to update the information as required. Keeping your profile details accurate ensures proper communication, correct timezone-based scheduling, and smooth integration with other platform features.
2. Configuration:
The Configuration section in Settings allows you to control platform-level behaviors, chat operations, campaign permissions, automation rules, and system preferences. This section helps administrators customize how Chat360 functions for agents, managers, and customers
Below is an overview of the available configuration modules:
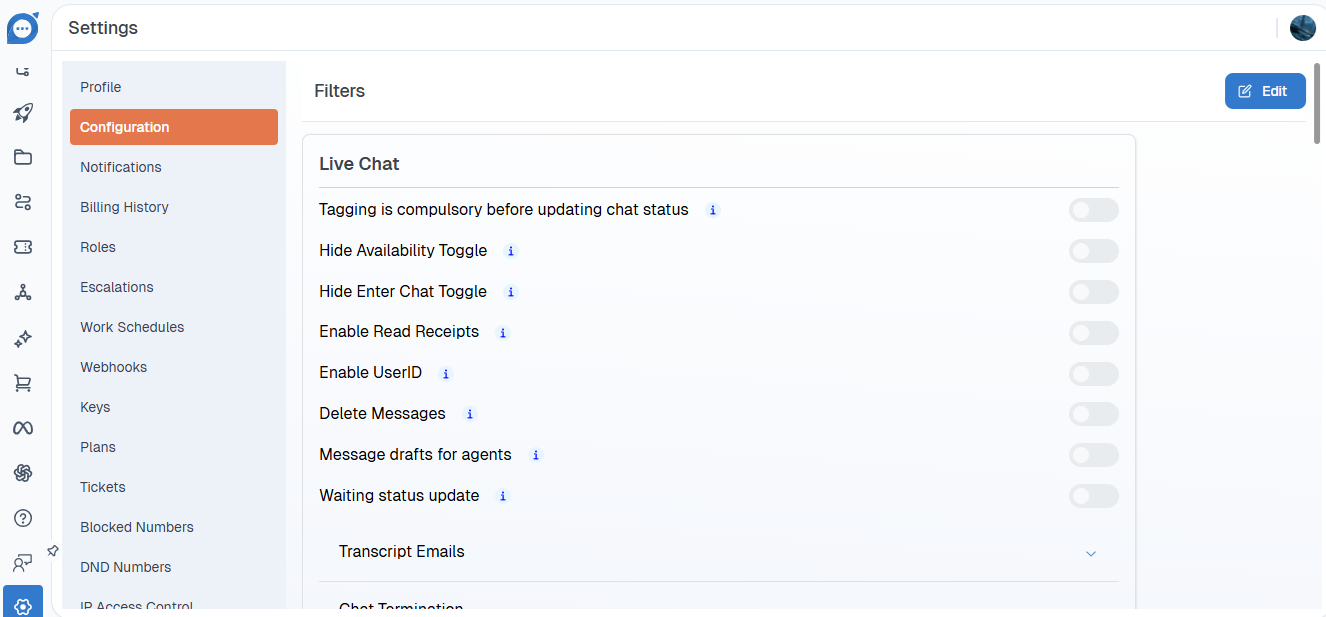
1. Live Chat: Manage chat-related controls and agent interaction settings:
Make tagging mandatory before updating chat status
Show/Hide availability toggle on agents chat widget.
Enable read receipts
Allow message deletion
Enable user ID display
Delete Messages : Enable users to delete the live chat messages.
Save message drafts for agents
Configure waiting status updates
Set transcript email preferences
Configure chat termination : Keywords and End Chat Message.
Define chat history retention policy
Manage iframe notifications
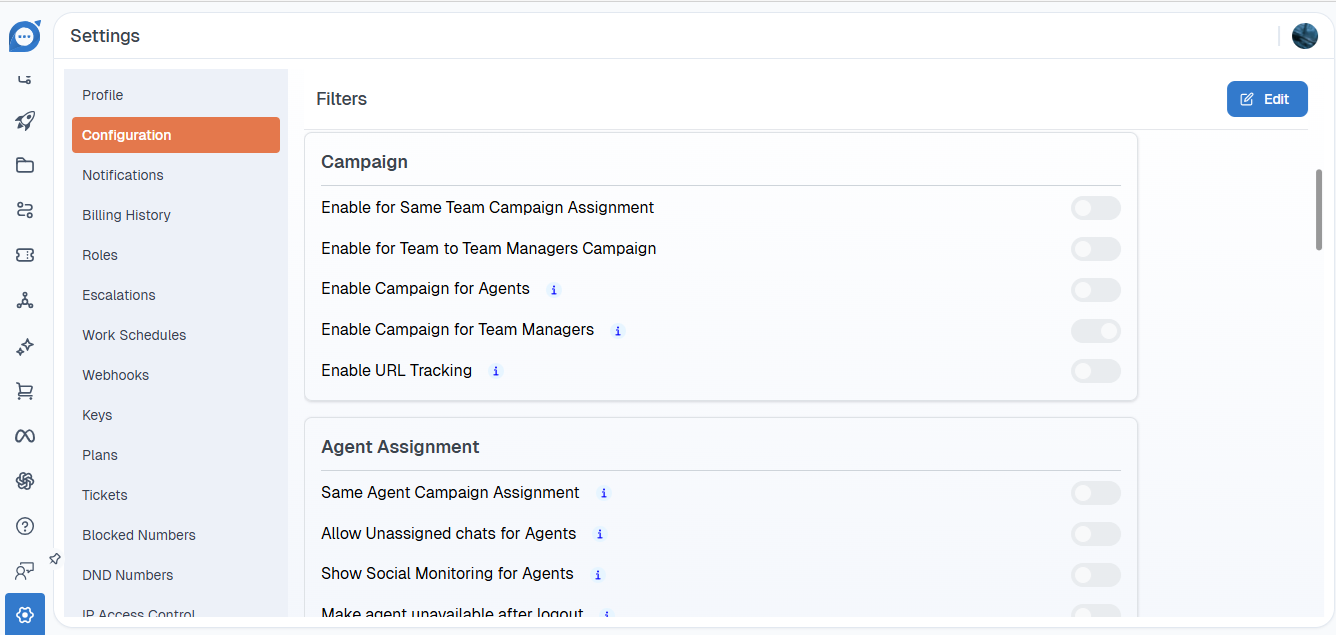
2. Campaign Settings
Control campaign access and tracking:
Enable campaign assignment for same teams
Allow team-to-team manager campaign access
Enable campaigns for agents and team managers
Enable URL tracking for campaigns
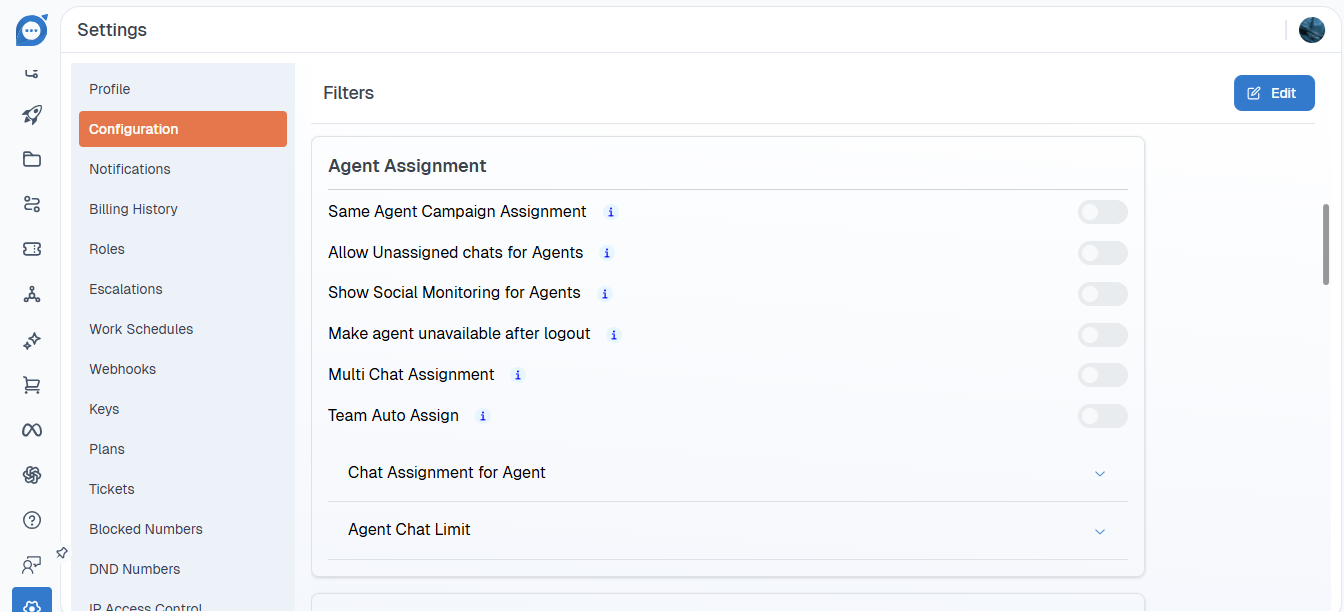
3. Agent Assignment
Configure how chats are distributed among agents:
Same agent campaign assignment:Assign the chats to the same agents who have created the campaign.
Allow unassigned chats
Enable social monitoring for agents
Auto mark agent unavailable after logout
Multi-chat assignment
Team auto-assign : Assign chat to team automatically.
Define reassignment reasons
Configure agent chat limits
4. Feedback Manage customer feedback settings:
Website feedback configuration
WhatsApp feedback setup
Set default feedback messages
Enable/Disable customization
Additional feedback toggles
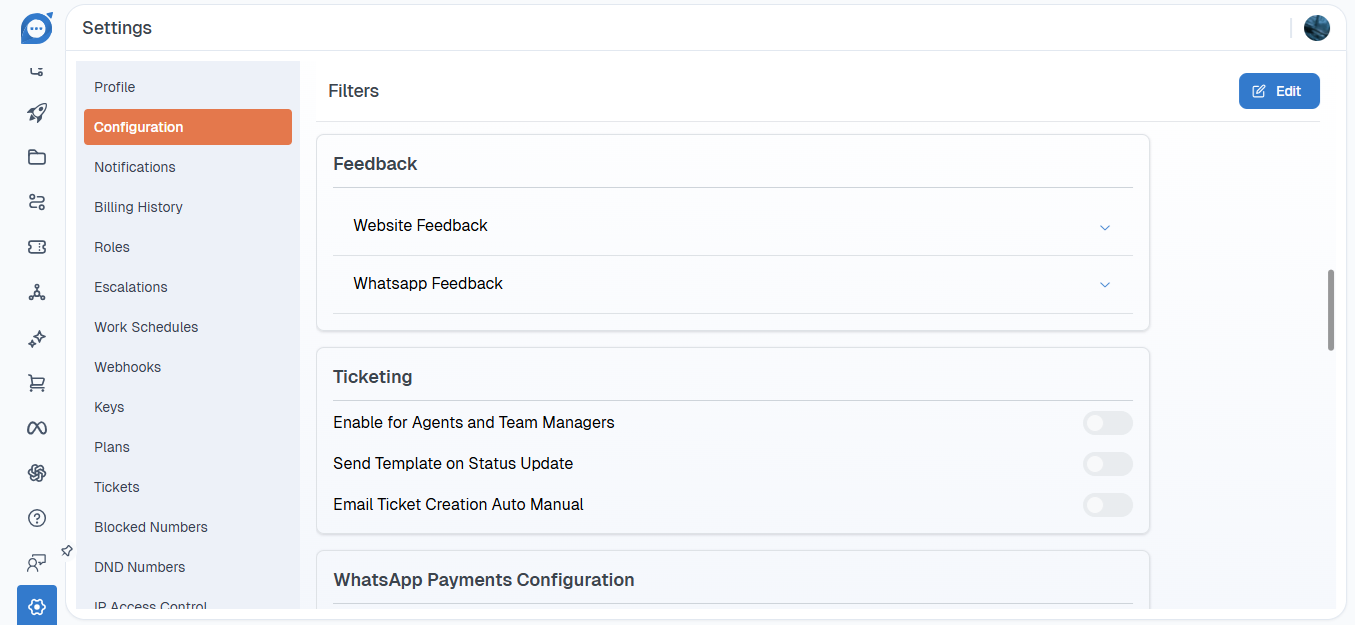
5. WhatsApp Payments Configuration
Customize payment-related messaging:
Set payment description
Configure completed, pending, and failed status messages
6. Template Configuration
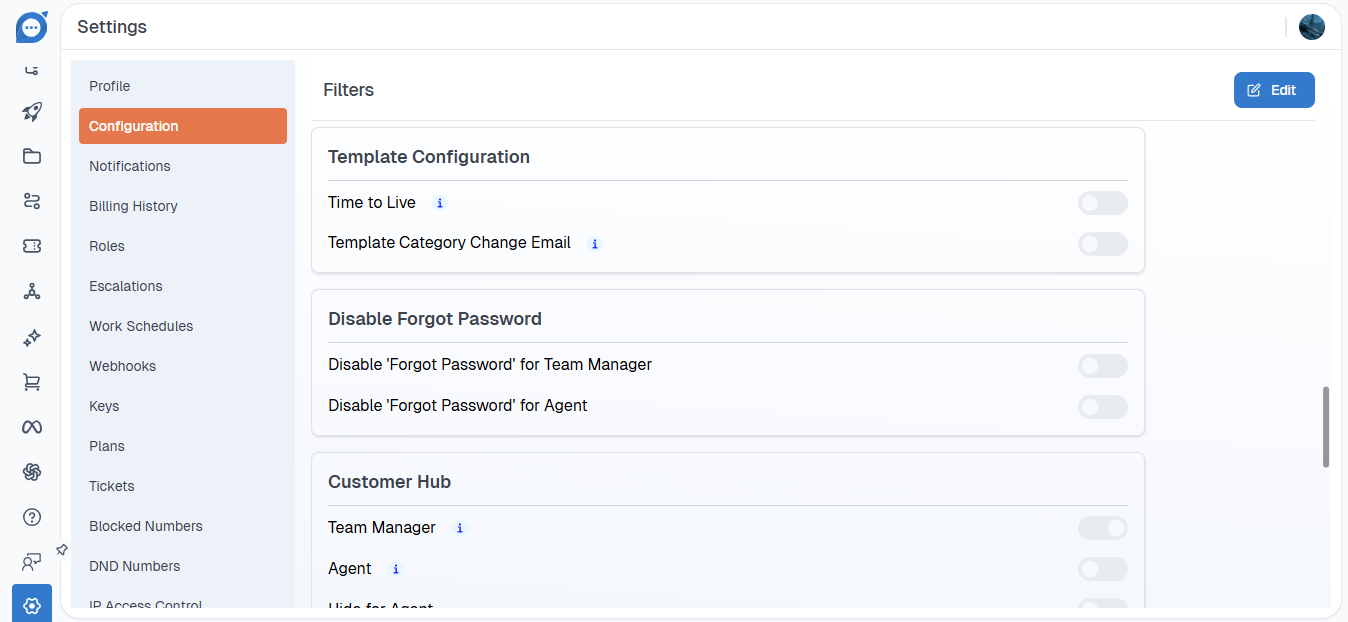
Manage template-related controls:
Set template Time-to-Live (TTL)
Enable template category change notification emails
7. Security Controls
Disable "Forgot Password" option for agents or team managers
8. Customer Hub
Control access levels for:
Team Managers: To hide the block contact option in the live chat for a Team Manager.
Agents: To hide the block contact option in the live chat for an agent
Visibility settings for agents
9. Bot Settings
Enable or manage bot section access for team managers
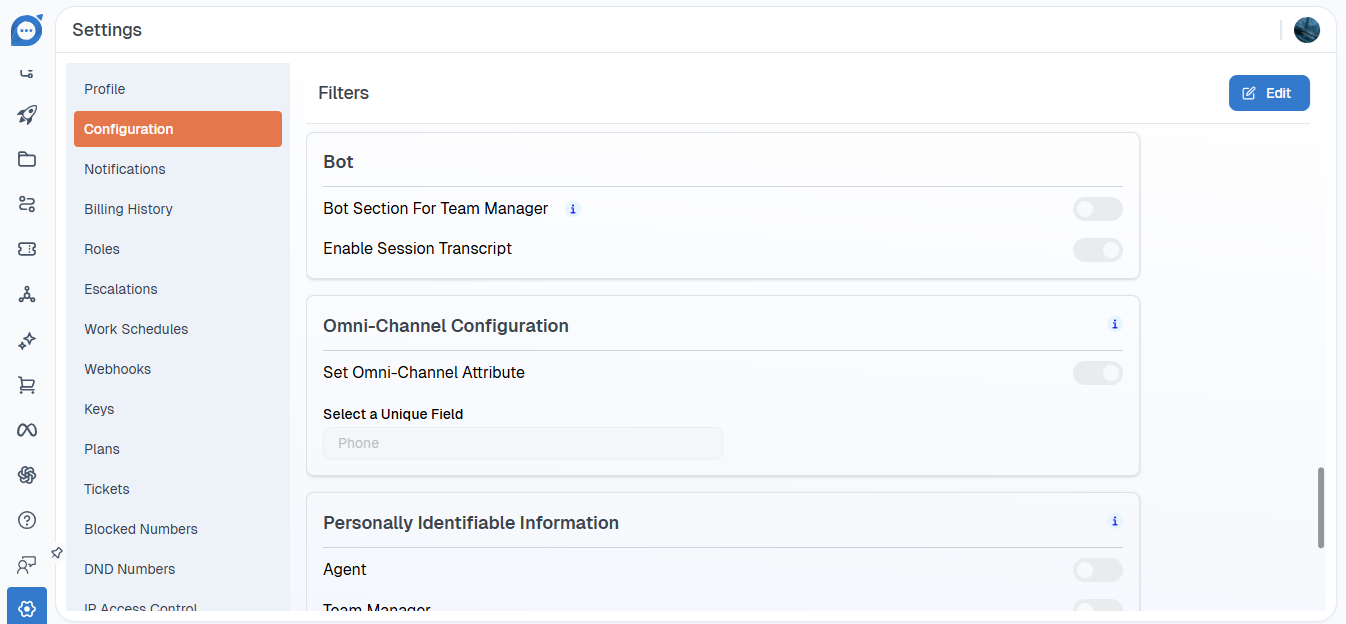
10. Omni-Channel Configuration: Omni-channel integration enables users to sync various communication channels (such as WhatsApp, Facebook, Email, etc.) into a single platform.
Configure unified customer identity:
Set Omni-channel attributes
Select a unique field (e.g., phone number) for cross-channel user mapping
11. Personally Identifiable Information (PII): Control visibility of sensitive data for:
Agents
Team Managers
Admins
12. Agent Break Configuration: Define break types for agents and manage availability tracking.
13.Website Configuration
Manage website-level integrations and ensure proper connectivity between your website and Chat360 for seamless chat and automation functionality.
Retry Webhook Logs: Automatically retries failed webhook events to ensure important data is successfully delivered to external systems.
The Configuration section provides administrators with full control over operational workflows, security settings, automation behavior, and communication rules to ensure efficient and secure platform usage.
3. Notifications:
The Notifications section allows you to configure how agents, admins, and teams receive alerts for activities such as new messages, room assignments, credit usage, and API failures.
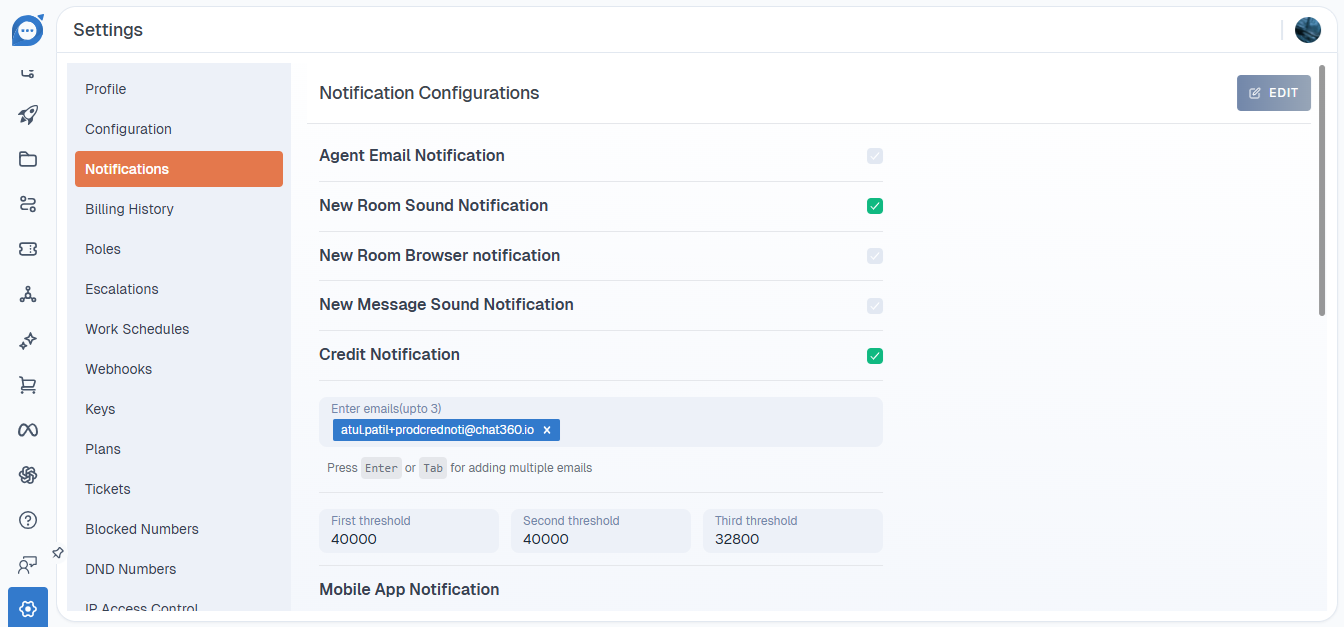
1.Agent Email Notifications : This section controls email and in-app alert behavior for agents. Agent Email Notification : Enable or disable email notifications sent to agents for assigned activities.
New Room Sound Notification : Plays a sound when a new conversation (room) is created. New Room Browser Notification : Triggers a browser push notification when a new room is created. New Message Sound Notification: Plays a sound when a new message is received. Credit Notification :This section helps you monitor your account credit balance and avoid service interruptions.Turn this on to receive alerts when your credit balance reaches defined thresholds. You can add up-to 3 email recipients and
Credit Threshold Levels – Configure three alert levels (First: early warning, Second: medium urgency, Third: critical) to automatically trigger email notifications when your credit balance drops to the defined limits.
3. Mobile App Notification : This section controls push notifications sent to mobile devices.
A. New Room Created Notification : Select who should receive notifications when a new conversation is created
Admin (toggle on/off)
You can also enable channel-specific alerts:
WhatsApp
Website
Facebook
Instagram
Twitter
Telegram
If enabled, notifications will trigger based on the channel where the conversation originated.
B. New Message Notification: Choose who should receive alerts when a new message is received
Agent
Team
Admin
Enable or disable each role using the toggle switch.
C. New Room Assigned : Controls notifications when a conversation is assigned to someone.You can enable alerts for:
Agent
Team
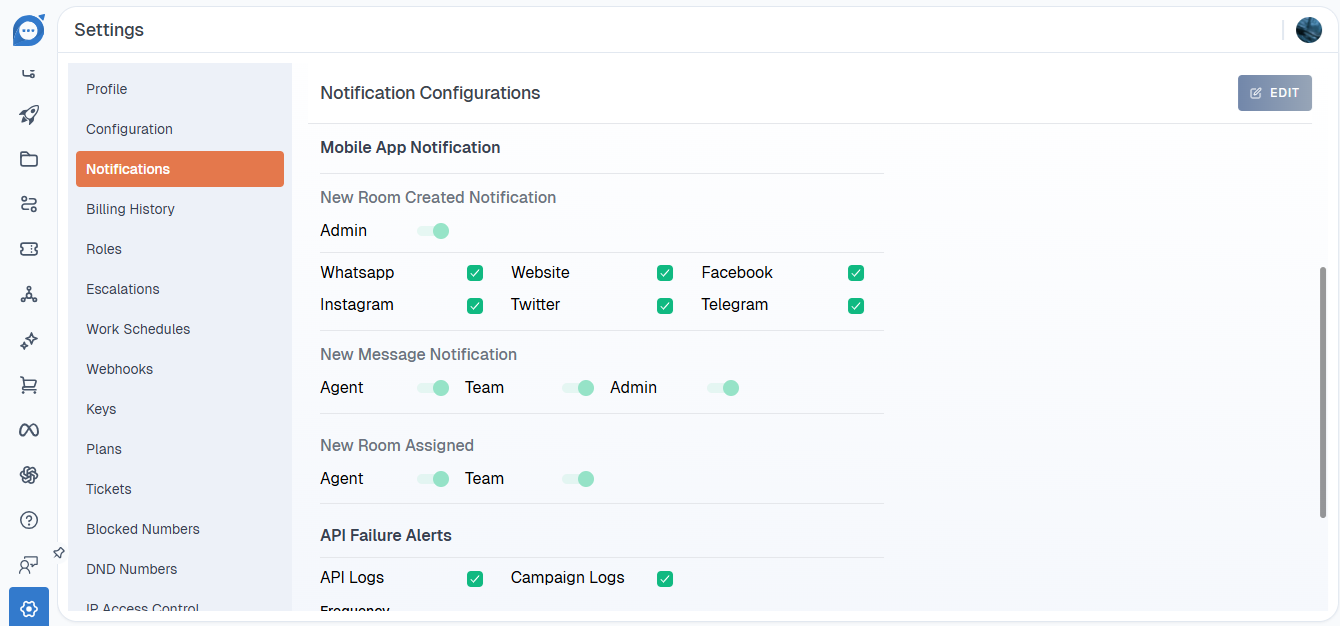
4. API Failure Alerts: This section allows you to monitor system or integration failures.
Log Types : You can enable alerts for
API Logs – Alerts when API requests fail.
Campaign Logs – Alerts when campaign-related operations fail.
Alert Frequency: Set how often alerts should be sent and frequency is configured in hours (e.g., every 3 hours). Add Alert Email Recipients (Up to 3)
4. Billing History:
The Billing History section provides a detailed breakdown of your platform usage and credit consumption across different communication channels such as WhatsApp, Voice, SMS, Email, and Gen-AI. You can filter data by Channel, Country Type, Year, and Month to view conversation counts, unique session counts, and credits consumed. It also allows you to download a Consumption Report for record-keeping and analysis.
Billing:
The Billing tab provides a usage-based breakdown of credit consumption across different channels such as WhatsApp, Voice, SMS, Email, and Gen-AI. It displays conversation counts, unique sessions, and credits consumed based on selected filters (Channel, Country Type, Year, and Month). This section helps you monitor ongoing usage and download consumption reports for analysis.
History: The History tab displays a complete record of your financial transactions and credit purchases made on the platform. It includes details such as Admin Email, Payment Date & Time, Transaction ID, Currency, Amount, Processing Charges, GST Amount, Total Amount, Payment Status, and Updated Balance. This section helps you track past payments, verify successful transactions, and maintain financial records.
5. Roles:
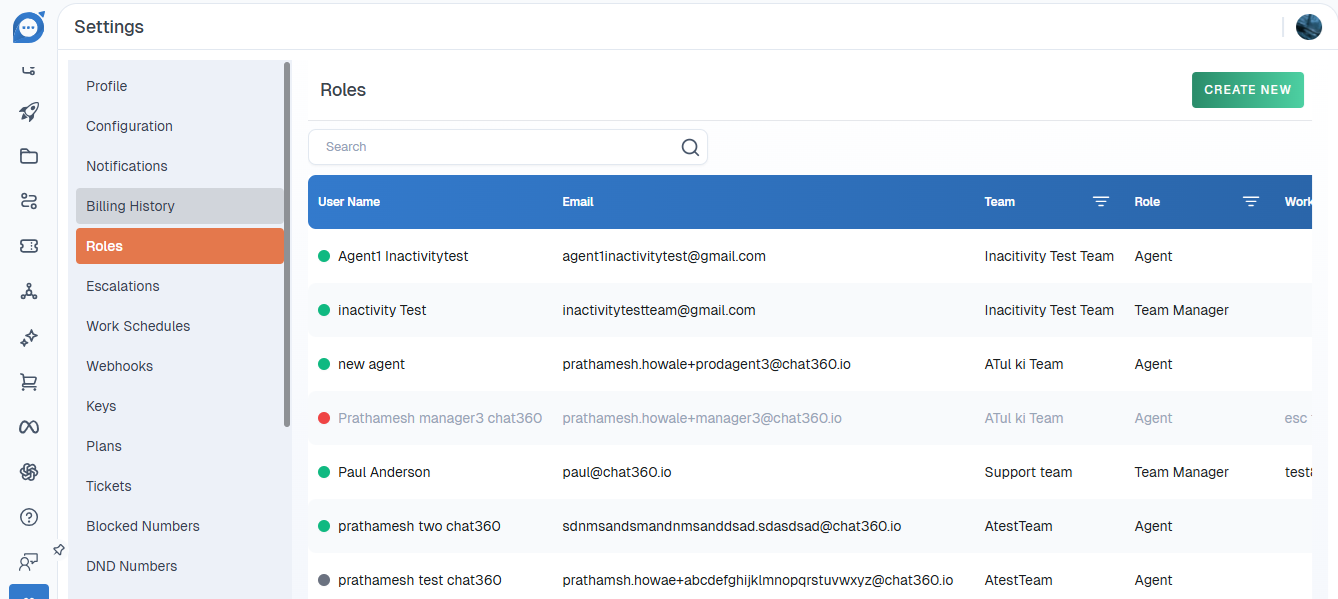
The Roles section allows you to manage users and define their access levels within the platform. From here, you can create, assign, edit, and control permissions for different types of users such as Team Managers and Agents.
Key Features:
Create Users – Use the Create New button to add a Team Manager or Agent.
Role Assignment – Assign users to specific teams with defined responsibilities.
Work Schedule Mapping – Link agents to configured work schedules.
Status Control – Enable or disable users using the status toggle.
Search & Filter – Quickly find users by name, email, team, or role.
Actions – Edit user details, manage permissions, or delete users from the system.
Role Types: Team Manager – Manages agents, monitors conversations, and oversees team performance. Agent – Handles chats, tickets, and customer interactions based on assigned permissions.
The Roles section ensures structured access control, better team management, and secure platform operations
6. Escalation
The Escalations section allows you to create and manage rules that automatically escalate conversations when specific conditions are met. This ensures timely handling of unresolved or delayed queries.
View Escalation Rules
The main table displays:
Escalation Name – Name of the rule
Escalation Categories – Category (e.g., Team)
Escalation Type – Type of escalation (e.g., Loop)
Bot Name – Associated bot
Status – Enable/disable toggle
Actions – Edit or Delete the rule
You can also control pagination and the number of rows displayed per page.
Add a New Escalation Rule
Click Add a New Escalation Rule to configure:
Escalation Title – Name of the escalation
Escalate Over – Select the escalation category
Escalation Type – Choose the escalation logic (e.g., Loop)
Bot – Select the bot to apply the rule
Agents – Assign agents for escalation
Timeout (in minutes) – Set the escalation time (in multiples of 5)
Rank for Escalation – Define priority level
Once configured, click Add Escalation Rule to save.
7. Work Schedule
The Work Schedule section allows you to assign schedules for your chat and voice bots according to your business needs.
To schedule the work of your bots:
Click Add New Schedule.
A new window will open where you can enter the details:
Title
Work Hours
Working Days
Enable Component Trigger
Time Zone
This allows bots to operate only during the configured business hours.
8. Tags and Attributes
The Tags and Attributes section helps organize contacts, segment users, and store structured customer data.
Access: Settings → Tags and Attributes
Tags
Tags are labels used to categorize chatrooms or contacts.
Use cases:
Campaign segmentation
Lead qualification
Conversion tracking
Fields:
Tag Name
Number of Chatrooms
Leadscore
Actions (Edit/Delete)
Attributes
Attributes store structured user data such as:
Location
Language
Custom properties
Used for:
Personalization
Automation flows
Audience filtering
Analytics
Fields include:
Attribute Name
Attribute Type
Number of Contacts
PII Data toggle
Variables
Auto Save Contacts
Automatically saves incoming users as contacts from chatbots.
This ensures no lead or interaction is missed.
9. Multi-factor Authentication
Multi-Factor Authentication (MFA) adds an extra layer of security.
Users must enter a one-time password (OTP) in addition to their password.
Enable MFA
Go to Multi-Factor Auth in settings
Enable the MFA toggle
Scan the QR code using an authenticator app
Enter the 6-digit OTP
Once enabled, OTP verification will be required during login.